 PixRinse
Screenshots show the English app. Preset names and controls are also available in your app language.
Your starting point
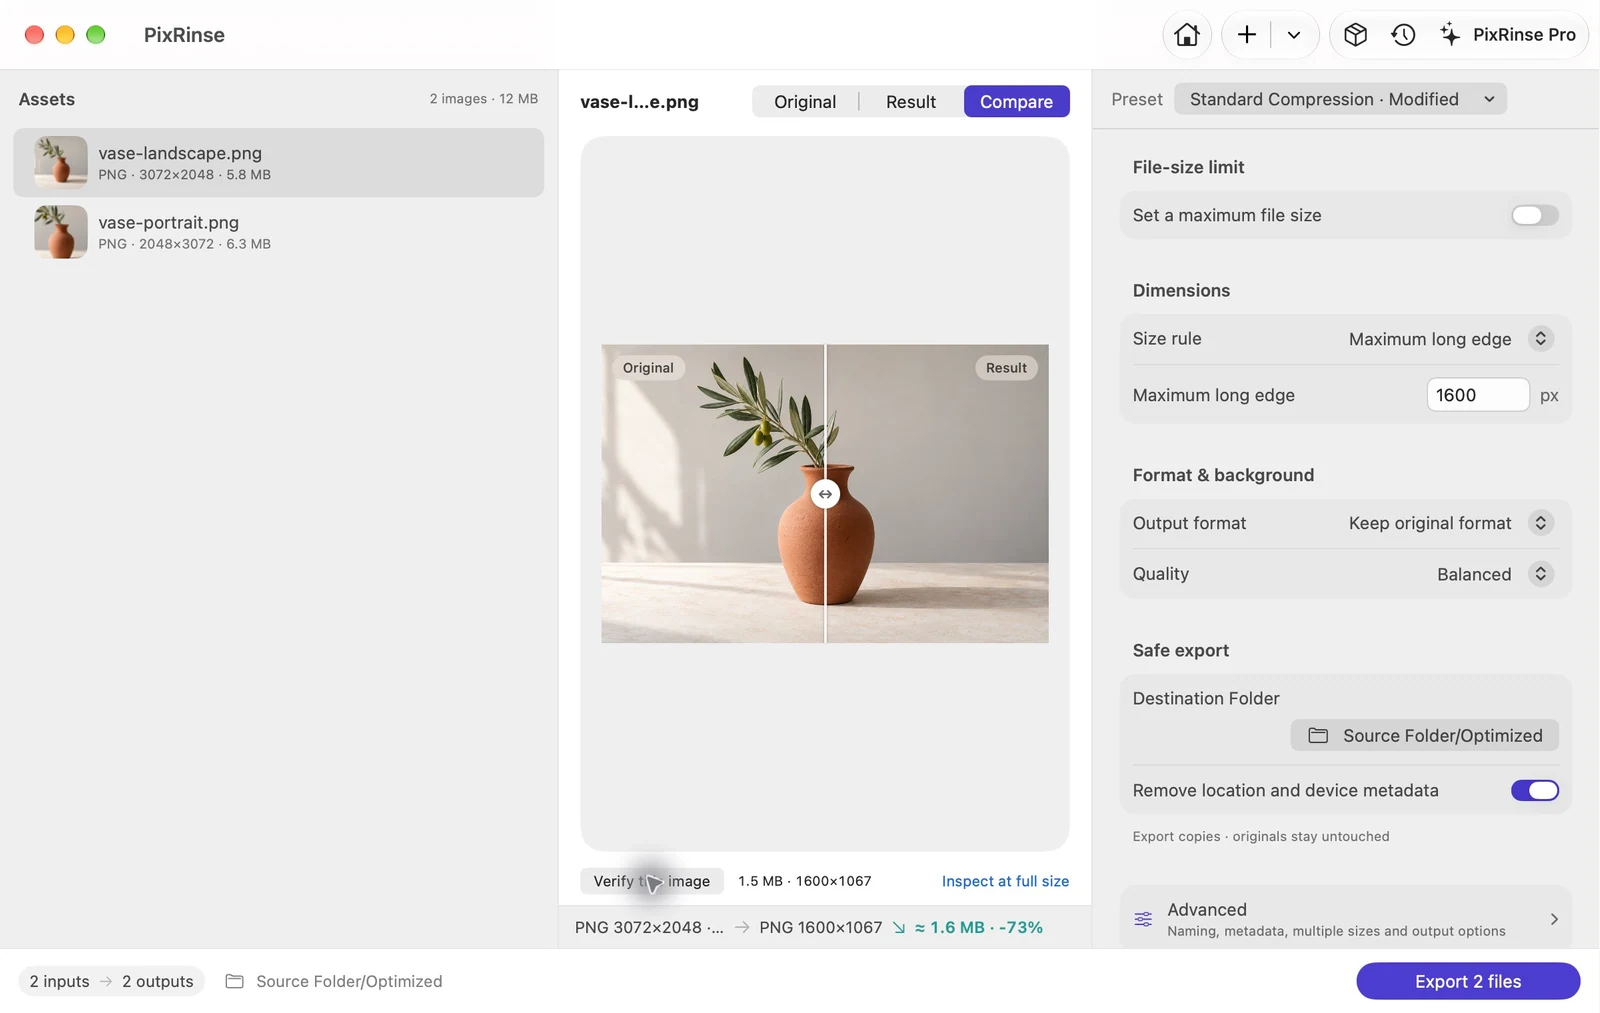
Use Standard Compression · customize in PixRinse, then review these settings against your actual destination.
| Long edge in this example | 1600 px, downscale only |
|---|---|
| Aspect ratio | Preserved |
| Format in this example | Keep original — PNG |
| Output | Separate exported copies |
How to do it
Add the folder or selected images
Check the source list for unsupported or problematic files. Include only the assets needed for the delivery.
Choose the size rule
For the two sample PNGs, set Maximum long edge to 1600 px and keep the original format. Use a fixed canvas instead when every image must have the same dimensions. Decide whether smaller sources should remain at their original size.
Preview representative images
Inspect at least one portrait and one landscape image. Check whether the rule crops, contains or scales the content in the way you expect.
Export copies and review
Choose a destination folder, review the planned output count and run the batch. Check actual dimensions on the resulting files.
THE FILES FROM THIS WALKTHROUGH
What this example produced
Two PNGs with different orientations use the same 1600 px long-edge rule. The landscape and portrait results keep their respective aspect ratios.
- Source dimensions
- 3072 × 2048 and 2048 × 3072
- Long edge
- 1600 px
- Output format
- Keep original — PNG in this example
| File | Format | Pixels | Bytes |
|---|---|---|---|
| vase-landscape.png | PNG | 1600 × 1067 | 1,530,939 |
| vase-portrait.png | PNG | 1067 × 1600 | 1,505,047 |
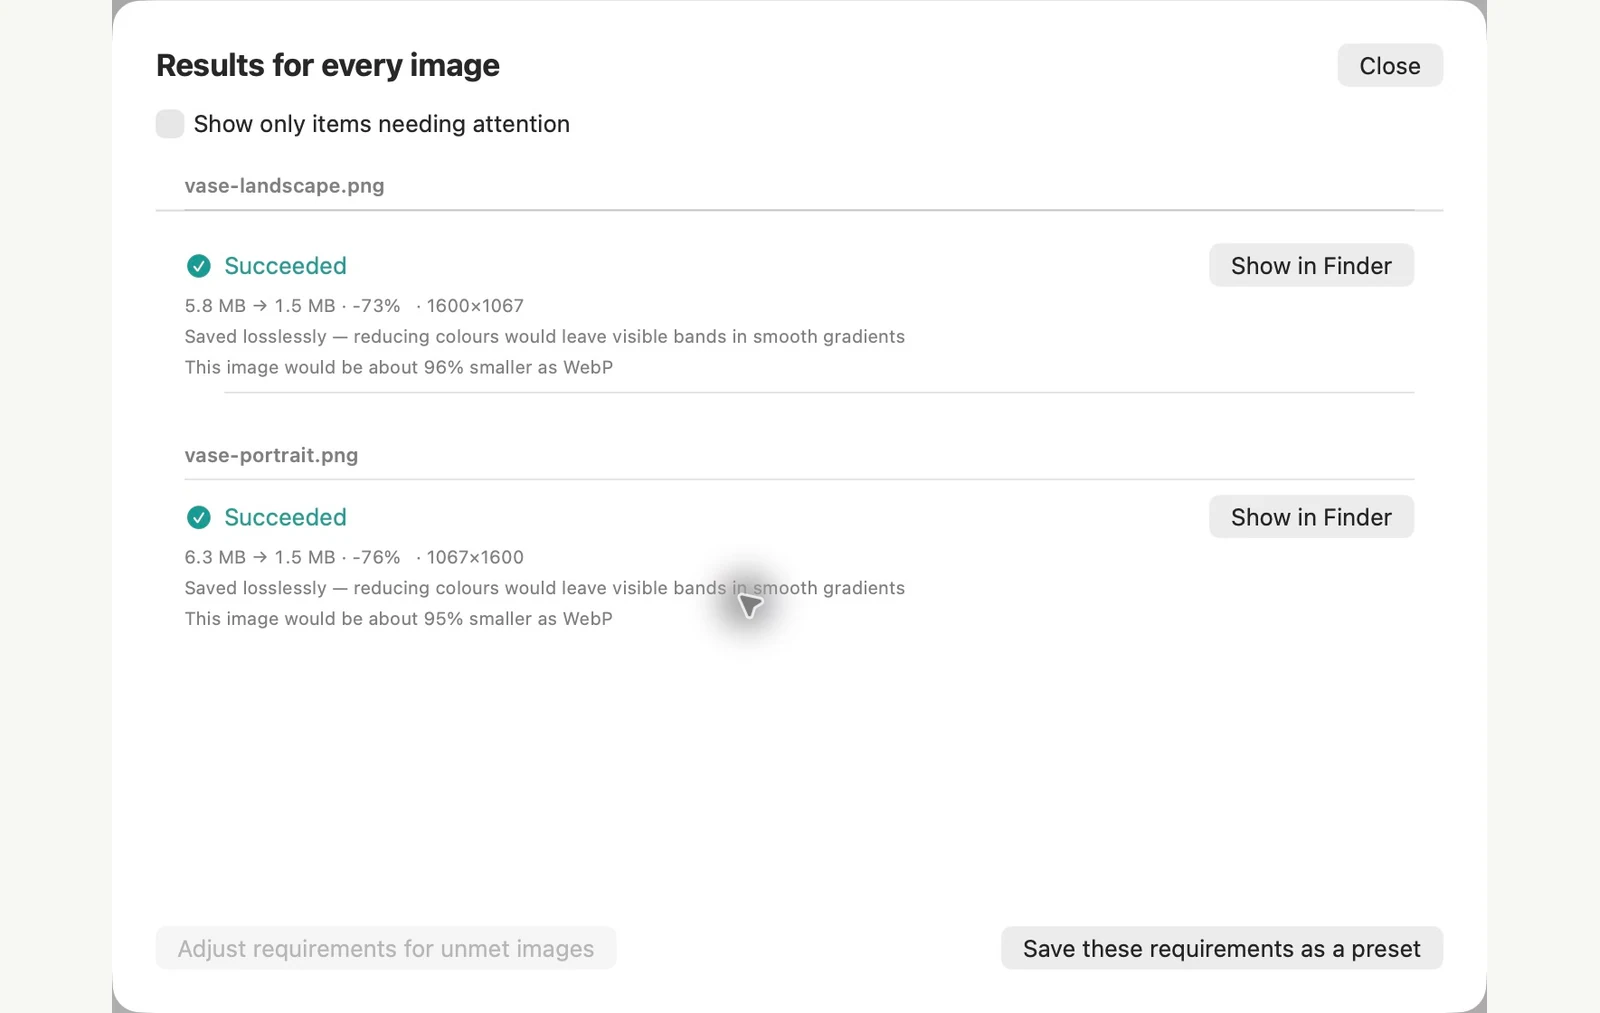
Measured on the sample files shown. Your results depend on your originals and settings. The ceramic-vase photograph is an AI-generated sample. The app screenshots and exported file measurements are real.
ALREADY ON YOUR MAC
Batch resize images with Preview or Terminal
Both are already on your Mac. Preview is visual but edits the files you open. Terminal’s sips command can write to a separate folder, if you are comfortable typing a command.
In Preview
Copy the images to a new folder first, because saving replaces the files you opened. Open the copies in one window, select them in the sidebar and choose Tools > Adjust Size. Choose a size under Fit into, click OK and save. Fit into 1280 × 1280 gave our landscape sample 1280 × 853 and our portrait sample 853 × 1280.
In Terminal
Open the folder in Terminal and run the commands below. The -Z option sets the maximum long edge, and --out keeps your originals unchanged. Without --out, sips overwrites the source files.
mkdir resized
sips -Z 1600 *.jpg --out resized
Where the built-in route stops
- Fit into offers a short list of sizes from 320 to 1920 px, with no 1600 option. A custom width makes every image that wide instead of setting a shared long edge: 1600 px scaled our 2048 × 3072 portrait sample to 1600 × 2400.
- sips kept GPS location and other metadata in our test, and its delete option did not remove GPS.
- Finder’s Convert Image can also resize, but only to its fixed Large, Medium and Small sizes.
PixRinse is a better fit when you want one rule for portrait and landscape images, a preview before export and separate output copies by default, with the option to keep folder structure or add a format and file-size requirement.
Tested on macOS 27 in November 2026 with sample images. Menu names can differ on other versions, and results depend on your files. Choosing between apps? Compare Mac image compressors.
A couple of common questions
Can I preserve the folder structure?
Yes. Output settings can preserve the source directory structure when exporting.
How many files can I resize for free?
The free tier processes up to 10 images per batch with one output per source. Pro removes these batch and multiple-output limits.
Put the workflow to work.
Open PixRinse, add a few images and start with the settings above.
Download for MacFree: up to 10 images per batch and one output per source. Compare Free & Pro.