 PixRinse
Screenshots show the English app. Preset names and controls are also available in your app language.
Your starting point
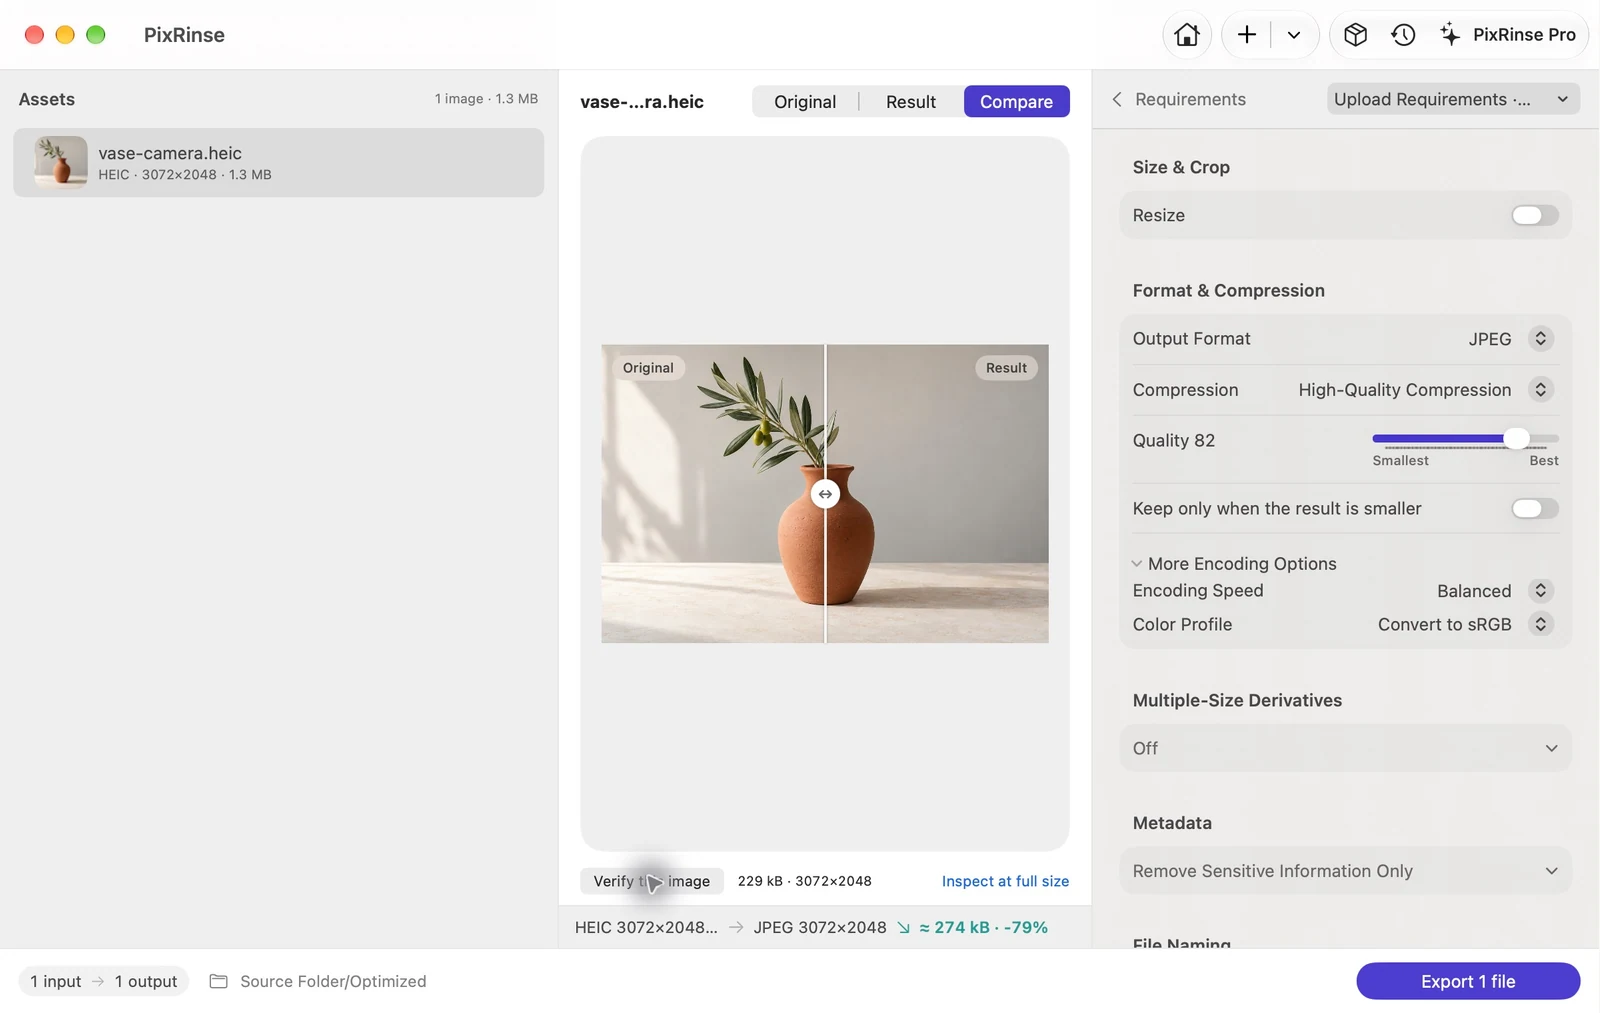
Use Upload Requirements · customize in PixRinse, then review these settings against your actual destination.
| Input | HEIC / HEIF |
|---|---|
| Output | JPEG (.jpg) |
| Dimensions in this example | Keep original — 3072 × 2048 |
| Quality in this example | 82 |
| Color in this example | sRGB |
| Recommended output | Export copies |
How to do it
Import your HEIC photos
Add files or their containing folder. PixRinse identifies supported images from their content rather than trusting only the extension.
Choose JPEG as the output format
Use Upload Requirements when you also have a byte cap. For this example, disable the file-size cap and select Keep original dimensions. In Advanced, use quality 82 and Convert to sRGB.
Review colour and metadata
For general sharing, sRGB is a practical choice. Remove location metadata for public sharing, or preserve capture dates when they matter to your archive.
Export and check the JPEGs
Inspect a representative image and confirm the .jpg output, dimensions and reported status before handing the set over.
THE FILES FROM THIS WALKTHROUGH
What this example produced
This example starts with a real HEIC file. Its JPEG copy keeps the original 3072 × 2048 dimensions, with no file-size cap.
- Quality
- 82
- Color profile
- sRGB
- Resize
- Off
| File | Format | Pixels | Bytes |
|---|---|---|---|
| vase-camera.jpg | JPEG | 3072 × 2048 | 228,877 |
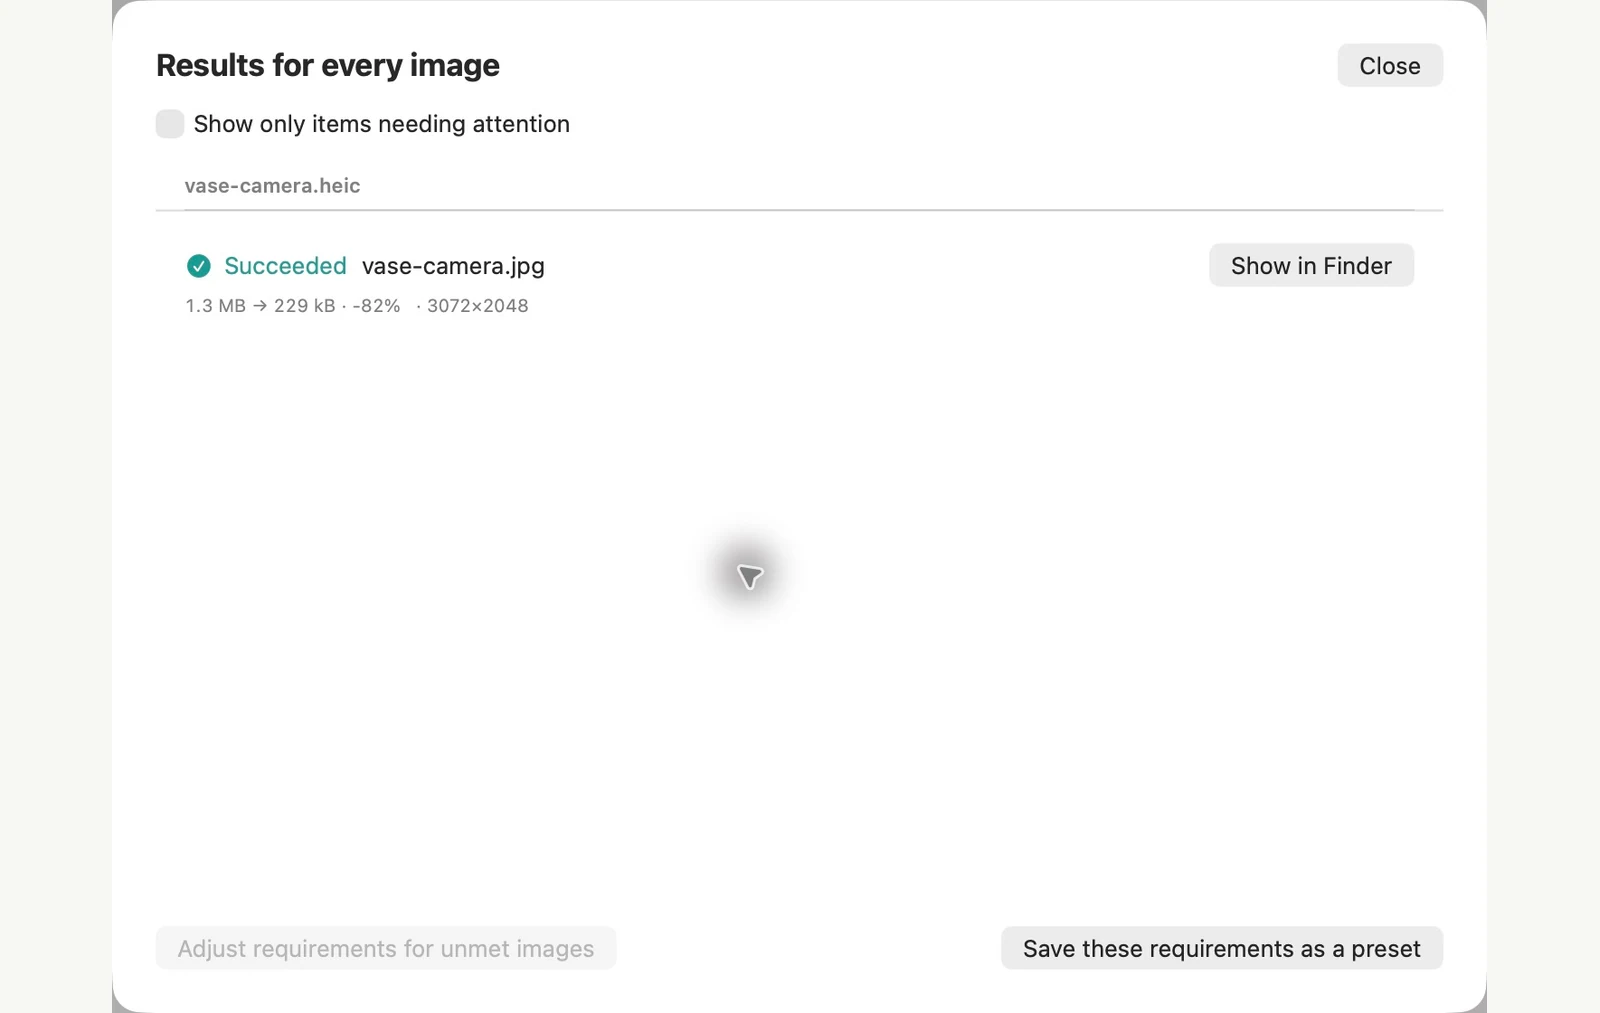
Measured on the sample files shown. Your results depend on your originals and settings. The ceramic-vase photograph is an AI-generated sample. The app screenshots and exported file measurements are real.
ALREADY ON YOUR MAC
Convert HEIC to JPG without installing anything
For a few photos, your Mac already has what you need. Finder’s Convert Image takes the fewest steps. Preview adds a quality slider.
In Finder
Select one or more HEIC files, Control-click the selection and choose Quick Actions > Convert Image. Set Format to JPEG, choose an Image Size, then click Convert to JPEG. The JPEGs appear next to the originals, which stay as they were.
In Preview
Open the photo, choose File > Export, set Format to JPEG, adjust Quality and save. For several photos, open them in one window, select them in the sidebar and choose File > Export Selected Images.
Where the built-in route stops
- Convert Image has four sizes and no quality control. On our 3072 × 2048 test photo, Large, Medium and Small came out 1280, 640 and 320 px wide.
- Location data can travel with the copy. Preview’s export kept GPS in our test and has no metadata option. Convert Image kept it too, because Preserve Metadata is on by default. Turning that off removed all the metadata we tested, including the capture date.
- Neither method takes a file-size limit. Preview shows an estimate, so you adjust and check.
PixRinse is a better fit when a batch needs exact dimensions, a byte limit or a selective metadata policy, such as removing GPS while keeping the capture date. For a handful of photos with no special requirements, the built-in tools are enough.
Tested on macOS 27 in November 2026 with sample images. Menu names can differ on other versions, and results depend on your files. Choosing between apps? Compare Mac image compressors.
A couple of common questions
Is changing .heic to .jpg enough?
No. Renaming an extension does not change the image encoding. Export an actual JPEG.
Should I delete the HEIC originals?
Keep the originals when you may need their original quality or photo-specific data. Exporting copies gives you a separate delivery set.
Put the workflow to work.
Open PixRinse, add a few images and start with the settings above.
Download for MacFree: up to 10 images per batch and one output per source. Compare Free & Pro.